


WordPress: How to embed the Unified Factory Widget
More and more online business entrepreneurs are choosing to implement ready-to-use solutions for their website or store, as confirmed by Interaktywnie.com. As many as 84% of surveyed respondents choose to implement one of over 40 commercially available ecommerce systems.
This is not only convenient because we can quickly and easily see what our platform offers and whether it really meets our expectations, but its low cost. This solution will allow us to organize logistics or payments from the get-go, but we still have another challenge. Customer service.
Knowing the importance of a consistent communication history with customers, we decided to create a series of articles showing how easy it is to implement a customer service tool using the most popular store solutions such as WordPress, Shopper, Shoplo, IAI Shop, Presta, or tools like WordPress or Joomla.
4 steps to Embed the Unified Factory Widget on WordPress
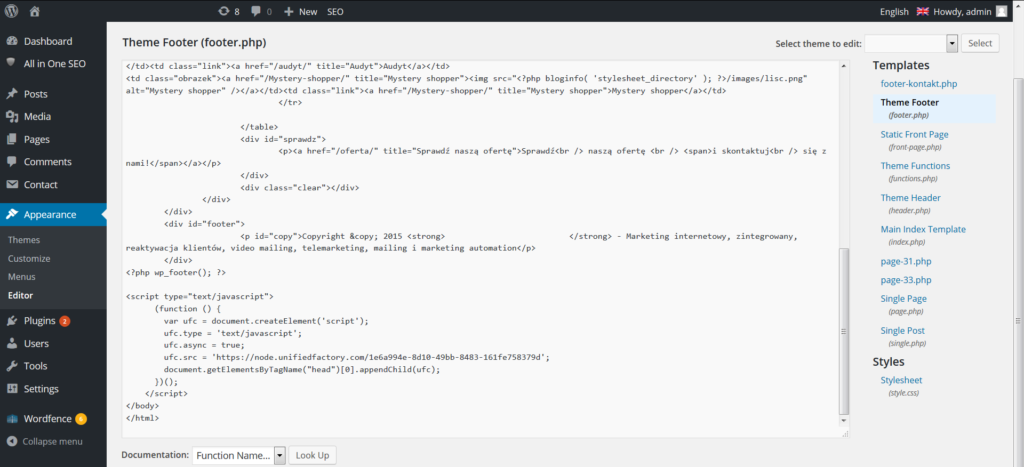
1. To embed the Unified Factory Communicator on a site that is built on WordPress, just log in to the administration panel and from the main menu on the left, select the “Appearance” tab, then “Editor”.
2. On the right side of the window a list of templates will appear where we search for the item called “Theme Footer”.
3. When you click on an item, you will see a code box where you can search for a place before the </ body> tag. To do this, you can either use the search engine at the top of the page or open a search box with the CTR + F command.
4. Once you find the </ body> tag, paste the Unified Factory script that you previously copied.
We save the changes and go to configure the communicator settings directly in UF Easy. After completing the configuration, simply change the status to “Online” and enjoy voice, chat, email and Facebook messenger in one tool, Easy Unified Factory.
Do you need instructions in pdf? No problem, just click!